
This manual provides essential guidance for the safe operation, maintenance, and troubleshooting of the Craftsman 919.165310 air compressor. It includes key features, technical specifications, and safety tips to ensure optimal performance and longevity of the equipment.
1.1 Overview of the Air Compressor Model 919.165310
The Craftsman 919.165310 air compressor is a robust tool designed for versatility and reliability. With a 5.5 HP motor and 30-gallon tank, it delivers consistent air pressure for various tasks. Its oil-free operation ensures low maintenance, while the direct-drive system enhances efficiency. Ideal for inflating tires, powering pneumatic tools, and small-scale industrial applications, this model balances performance and durability.
1.2 Importance of the Manual for Safe Operation
The manual is crucial for safe and effective operation of the Craftsman 919.165310 air compressor; It provides detailed safety guidelines, assembly instructions, and maintenance tips to prevent accidents and equipment damage. By following the manual, users can ensure optimal performance, longevity, and adherence to safety standards, making it an indispensable resource for both novice and experienced operators.
Key Features and Specifications
The Craftsman 919.165310 air compressor features a 5.5 HP motor, 30-gallon tank, and oil-free, direct-drive design, ensuring reliable performance for various pneumatic tasks and tools.
2.1 Technical Specifications of the Air Compressor
The Craftsman 919.165310 features a 5.5 HP electric motor, 30-gallon tank, and operates at 120V/60Hz. It delivers 10.2 CFM at 90 PSI, suitable for small to medium applications. The oil-free design ensures minimal maintenance, while the direct-drive system enhances efficiency. Built-in thermal overload protection and a pressure switch with relief valve ensure safe operation and long-lasting performance.
2.2 Design and Build Quality of the 919.165310 Model
The Craftsman 919.165310 features a durable steel tank and compact design for portability. Its oil-free pump reduces maintenance needs, while the direct-drive motor enhances efficiency. Built with high-quality materials, this compressor ensures reliable performance. The design includes a user-friendly control panel and sturdy construction, making it suitable for both home and small workshop use.
Safety Guidelines and Precautions
Always read the manual before use. Ensure proper ventilation and place the compressor in a dry, well-ventilated area. Keep the air filter clean and avoid obstructions nearby.
3.1 Essential Safety Tips for Operating the Air Compressor
Always read the manual before use. Ensure the compressor is placed in a clean, dry, well-ventilated area, at least 12 inches away from walls. Keep the air filter clear of obstructions. Avoid overloading the compressor and never modify it without authorization. Regularly inspect hoses and connections for damage. Wear safety goggles when operating pneumatic tools. Follow all safety guidelines to prevent accidents and ensure safe operation.
3.2 Precautions to Prevent Accidents and Equipment Damage
Ensure proper ventilation to prevent moisture buildup and reduce fire hazards. Regularly inspect the air filter and compressor head for blockages or damage. Avoid overloading the compressor beyond its rated capacity. Never operate the compressor near flammable materials or in poorly ventilated spaces. Check hoses and connections for leaks or wear. Store the compressor in a dry, cool environment to prevent corrosion and maintain performance. Always follow the manufacturer’s guidelines for operation and maintenance to minimize risks and extend equipment lifespan.

Operating Instructions
Start by plugging in the compressor, ensuring the tank is empty. Turn it on, let it build pressure, and monitor the gauge. Use pneumatic tools safely within the compressor’s capacity to avoid overload and ensure efficient operation.
4.1 Step-by-Step Guide to Starting the Air Compressor
Ensure the tank is empty and the drain valve is open. Plug in the compressor and turn it on. Allow it to build pressure until it reaches the cut-out level. Monitor the pressure gauge to ensure it operates within the recommended range. Once pressurized, close the drain valve and adjust settings as needed for your specific application.
4.2 How to Adjust Settings for Optimal Performance
To adjust settings on your Craftsman 919.165310 air compressor for optimal performance, start by checking the pressure gauge to monitor the tank pressure. Use the regulator to set the output pressure according to your tool’s requirements, adjusting the knob clockwise to increase and counterclockwise to decrease pressure. Ensure the cut-in and cut-out pressures are within the recommended range to maintain efficient compressor operation. Regularly drain moisture from the tank to prevent rust and check the air filter to ensure proper airflow. Lubricate moving parts as needed to reduce wear. Place the compressor in a well-ventilated, dry area to avoid overheating and moisture issues. Refer to your manual for specific guidelines on these adjustments to ensure safe and efficient operation.
Maintenance and Care
Regular maintenance ensures the longevity and efficiency of your air compressor. Drain moisture daily, clean the air filter, and lubricate moving parts to maintain performance and prevent wear.
5.1 Routine Maintenance Tasks for the 919.165310 Model
Regular maintenance is crucial for optimal performance. Drain moisture from the tank daily to prevent rust. Clean or replace the air filter monthly to ensure proper airflow. Lubricate moving parts as specified to reduce friction and wear. Inspect hoses and connections for leaks or damage. Check the pressure switch and relief valve to ensure they function correctly. Replace worn or damaged parts promptly to avoid equipment failure.
5.2 Cleaning and Lubrication Tips for Longevity
Regularly clean the air compressor using a soft cloth and mild detergent to remove dirt and grime. Dry thoroughly to prevent rust. Lubricate moving parts like piston seals and cylinders with the recommended oil to reduce friction. Check the manual for specific lubricant types. Apply lubrication after cleaning to ensure longevity and smooth operation of the compressor.
Troubleshooting Common Issues
Identify common problems like pressure drops or motor issues. Consult the manual for diagnostic steps and solutions to address malfunctions effectively and ensure proper operation.
6.1 Identifying and Diagnosing Common Problems
Common issues with the 919;165310 model include low air pressure, faulty pressure switches, and malfunctioning compressor pumps. Diagnosis involves checking for air leaks, analyzing pressure gauge readings, and inspecting electrical connections. Refer to the manual for detailed troubleshooting charts and error codes to pinpoint the root cause of any malfunction effectively.
6.2 Solutions for Air Compressor Malfunctions
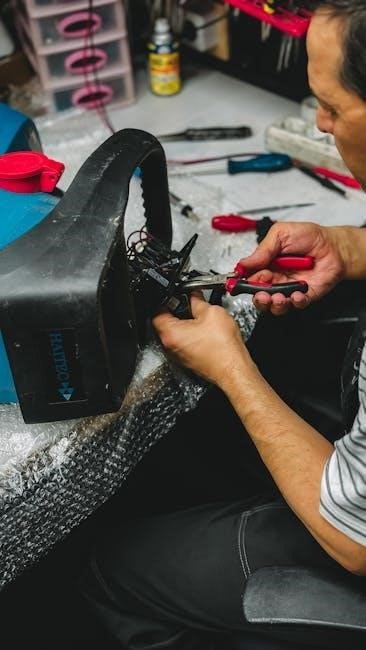
Malfunctions like low air pressure or faulty switches can be resolved by replacing worn parts. Check and clean air filters, inspect electrical connections, and ensure proper lubrication. For compression issues, replace the compression pump ring (FIX10044469) or air compressor kit (FIX10048100). Refer to the manual for guidance on part replacements and troubleshooting steps to restore functionality efficiently.
Repair and Replacement Parts
For the 919.165310 air compressor, genuine parts like pressure switches, pump rings, and air compressor kits are available. Users can source these from Sears Parts Direct or Fix.com. Ensure to reference part diagrams and manuals for accurate repairs and replacements to maintain optimal performance and safety.
7.1 Identifying the Right Replacement Parts for the 919.165310
Identifying the correct replacement parts for the 919.165310 air compressor involves referencing the official parts diagrams and manuals. Genuine parts such as the air compressor kit (FIX10048100) and compression pump ring (FIX10044469) are crucial for maintaining performance. Sears Parts Direct and Fix.com offer OEM components, ensuring compatibility and reliability. Always cross-check part numbers with the provided diagrams to avoid errors during repairs.
7.2 Sources for Genuine and Aftermarket Parts
Genuine parts for the 919.165310 air compressor can be sourced from Sears Parts Direct and Fix.com, offering OEM components and expert repair assistance. Aftermarket alternatives are available on platforms like eBay and Amazon, providing cost-effective options without compromising quality. Always verify compatibility with the 919.165310 model using part diagrams and manufacturer guidelines to ensure proper fitment and functionality.

Manuals and Documentation
The 919.165310 air compressor manual is available for download from Sears Parts Direct and Fix.com, offering detailed guides for safe operation, maintenance, and troubleshooting procedures;
8.1 Types of Manuals Available for the 919.165310
The 919.165310 air compressor offers an Owner’s Manual and a Repair Parts Manual. The Owner’s Manual includes safety guidelines, assembly, operation, and maintenance instructions. The Repair Parts Manual provides detailed diagrams, part lists, and troubleshooting guides. Both are available for download from Sears Parts Direct and Fix.com, ensuring comprehensive support for users.
8.2 How to Download or Access the Manual Online
To access the 919.165310 air compressor manual, visit websites like Sears Parts Direct or Fix.com. Search for the model number, and select the appropriate manual. Download the PDF or view it online. Ensure compatibility with your device for easy access. If assistance is needed, contact customer support via phone or email for further guidance.
Common Problems and Solutions
Common issues with the 919;165310 air compressor include the compressor not producing air, often due to faulty parts like the air compressor kit or compression pump ring. Solutions involve replacing these components and ensuring proper placement in a well-ventilated area with a clear air filter for optimal performance.
9.1 Frequently Encountered Issues with the 919.165310
The 919.165310 air compressor often faces issues like the compressor not producing air, typically due to a faulty air compressor kit or worn compression pump rings. Other common problems include clogged air filters, which reduce airflow, and improper ventilation leading to overheating. Regular maintenance, such as cleaning the air filter and inspecting for worn parts, can help prevent these issues.
9.2 DIY Fixes for Common Air Compressor Problems
Common issues with the 919.165310 can often be resolved with simple DIY fixes. Replace the air compressor kit (FIX10048100) or compression pump ring (FIX10044469) if the compressor isn’t producing air. Clean or replace clogged air filters to improve airflow. Ensure proper ventilation to prevent overheating. Regular lubrication and checking for worn parts can also address many operational problems effectively.
Performance Optimization Tips
Ensure optimal performance of the 919.165310 by placing it in a well-ventilated area, cleaning the air filter regularly, checking for worn parts, and lubricating components to enhance efficiency and reduce wear.
10.1 Enhancing the Efficiency of the Air Compressor
Regularly drain moisture from the tank to prevent rust and maintain performance. Ensure the air filter is clean and free of obstructions. Check for worn or damaged hoses and replace them promptly. Keep the compressor in a cool, well-ventilated area to avoid overheating. Lubricate moving parts as recommended and inspect belts for proper tension. These practices will maximize efficiency and extend the compressor’s lifespan.
10.2 Best Practices for Using Pneumatic Tools
Always use pneumatic tools with proper technique and follow the manufacturer’s guidelines. Inspect tools and hoses for damage before use. Wear safety goggles and ensure the work area is clear of obstructions. Avoid overloading the tools, as this can reduce performance and cause wear. Regularly check and maintain tool connections to prevent air leaks and ensure efficient operation.
Environmental and Placement Considerations
Place the air compressor in a clean, dry, well-ventilated area, at least 12 inches away from walls. Ensure proper ventilation to prevent moisture buildup and optimize performance.
11.1 Proper Location for the Air Compressor
Place the air compressor in a clean, dry, well-ventilated area, away from direct sunlight and flammable materials. Ensure it is at least 12 inches away from walls and obstructions. Choose a level, stable surface to prevent vibration and ensure proper operation. Avoid areas with high humidity or extreme temperatures to maintain efficiency and longevity of the equipment.
11.2 Ventilation Requirements for Safe Operation
Ensure proper ventilation around the air compressor to prevent overheating and moisture buildup. Keep the air filter clear of obstructions to maintain airflow. The compressor should be placed in a well-ventilated area, away from confined spaces, to avoid accumulation of compressed air byproducts; Maintain a minimum distance of 12 inches from walls or obstructions to ensure efficient cooling and safe operation.
Proper usage, regular maintenance, and adherence to safety guidelines ensure optimal performance and longevity of the air compressor. This manual serves as a valuable resource for users.
12.1 Summary of Key Points
The air compressor 919.165310 manual emphasizes safety, proper operation, and maintenance for optimal performance. It highlights technical specifications, troubleshooting, and care tips to extend equipment life. Regular maintenance, correct usage, and adherence to guidelines ensure reliability and efficiency. This comprehensive guide is essential for users to maximize the compressor’s functionality and longevity while ensuring safe working conditions and preventing potential issues.
12.2 Final Tips for Maximizing the Lifespan of the Air Compressor
Regularly inspect and clean the air compressor to ensure optimal performance. Store it in a clean, dry, and well-ventilated area to prevent rust and moisture buildup. Use genuine replacement parts and follow the manual’s maintenance schedule. Proper lubrication, filter cleaning, and pressure adjustments will extend its lifespan. Always adhere to safety guidelines and operational best practices for reliable service.