
Discover how to create a stunning wedding arch with free PDF plans. Explore designs, materials, and DIY tips to craft a beautiful, customizable centerpiece for your ceremony;
1.1 Importance of a Wedding Arch in Ceremony Design
A wedding arch is a focal point that sets the ceremony’s tone, providing a stunning backdrop for vows. It enhances the aesthetic, reflects the couple’s style, and creates a memorable ambiance for photos. Free PDF plans offer customizable designs, helping couples save costs while crafting a meaningful centerpiece that aligns with their vision and decor.
1.2 Benefits of Using Free Wedding Arch Plans
Free wedding arch plans offer cost-effective solutions, allowing couples to save on expenses. They provide customizable designs, catering to various themes and preferences. With DIY instructions, these plans empower creativity and personalization, ensuring a unique and memorable ceremony centerpiece without compromising on quality or style.
Materials and Tools Needed for Building a Wedding Arch
Essential materials include wood, metal, or PVC for the frame, fabric, flowers, and decorations. Tools needed are drills, saws, screws, and measuring tape. Floral wire and ornaments are optional.
2.1 List of Essential Materials
Primary materials include durable wood, metal, or PVC frames. Fabric, flowers, ribbons, and greenery are popular for decoration. Optional items like floral wire, ornaments, and fairy lights enhance the design. Choose weather-resistant materials for outdoor events to ensure longevity and stability. These elements combine to create a stunning, customizable wedding arch that matches your theme and style perfectly.
2.2 Recommended Tools for Assembly
Essential tools include a drill, screwdriver, and wrench for securing parts. A saw or cutting tool is needed for trimming materials. Sandpaper or an orbital sander ensures smooth surfaces. Measuring tape and level guarantee accurate assembly. Utility knife and clamps aid in precise cuts and holding pieces in place. These tools ensure a sturdy and visually appealing wedding arch structure.
Step-by-Step Guide to Building a Wedding Arch
Build your dream wedding arch with a simple, step-by-step guide. Start by preparing the base, then assemble the frame, and finally add decorative elements for a stunning finish.
3.1 Preparing the Base Structure
Start by gathering materials like wood, screws, and brackets. Ensure the base is level and sturdy to support the arch. Use a measuring tape to mark the dimensions accurately. Assemble the base frame using pre-drilled holes for stability. Sand the wood to smooth out rough edges before moving to the next step. This ensures a solid foundation for your wedding arch.
3.2 Assembling the Arch Frame
Attach the vertical posts to the base using screws and brackets. Connect the horizontal beams to form the arch shape. Ensure all joints are secure and aligned properly. Use clamps to hold pieces in place while tightening. Double-check the frame’s stability before adding decorative elements. Sand any rough edges for a polished finish.
3.3 Attaching Decorative Elements
Begin by attaching flowers, fabric, or greenery using floral wire or ties. Secure heavier decorations with screws or brackets. Balance the design by distributing elements evenly. Add lighting for a romantic ambiance. Ensure all attachments are stable to prevent damage. For detailed guidance, refer to free PDF plans and tutorials available online.
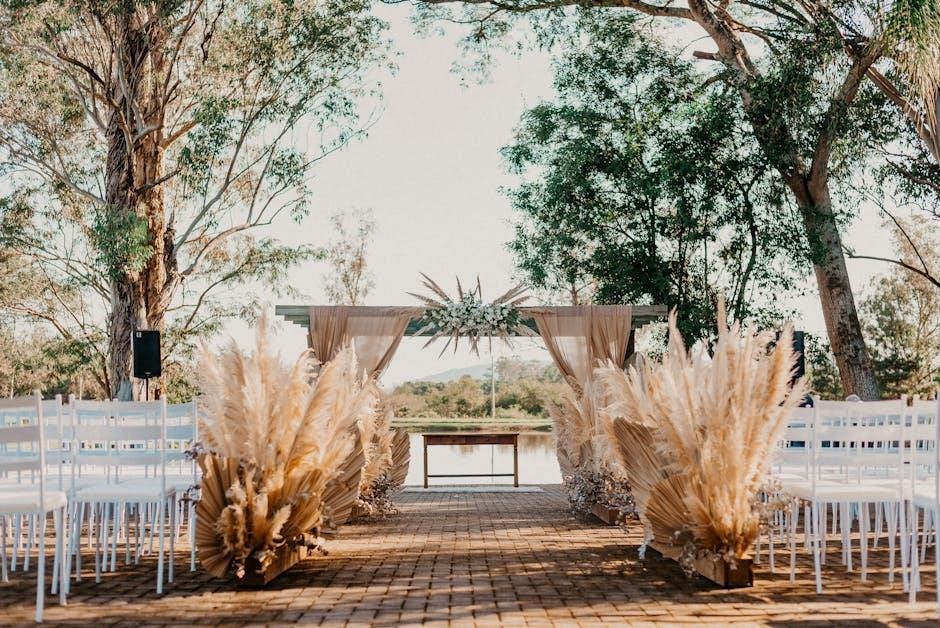
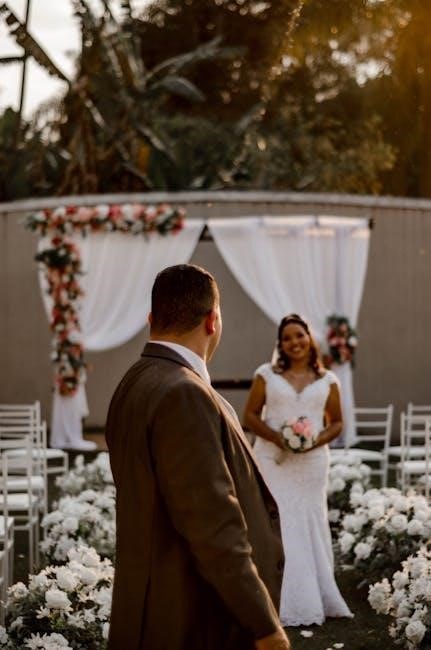
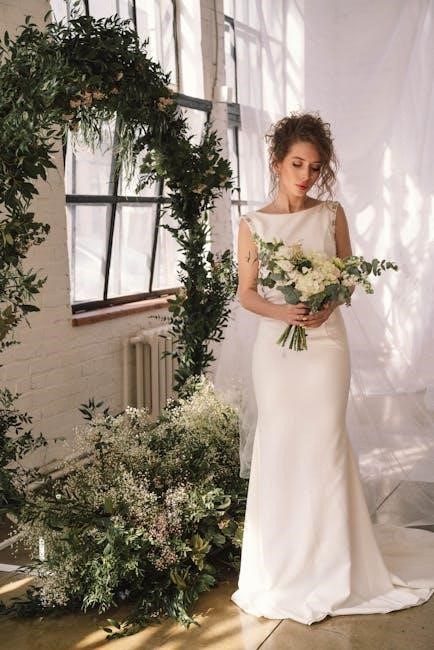
Design Ideas for Wedding Arches
Explore classic, modern, and rustic designs. Incorporate floral arrangements, greenery, or fabric for a personalized look. Seasonal themes like summer blooms or winter lights add unique charm.
4.1 Classic and Modern Arch Designs
Classic wedding arches often feature timeless materials like wood or metal, adorned with floral arrangements or greenery. Modern designs incorporate sleek lines, minimalistic decor, and innovative materials. For a classic look, opt for a floral-draped arch, while modern designs might include geometric shapes or fabric drapes. Both styles can be customized to fit your wedding theme, ensuring a memorable ceremony backdrop.
4.2 Seasonal and Themed Arch Ideas
Seasonal wedding arches reflect the beauty of nature. Summer arches often feature bright flowers and greenery, while spring designs incorporate blossoms. Winter arches may include pinecones, twinkle lights, or frosted decor. Themed arches, like beach or rustic styles, use elements such as shells or burlap. These designs enhance the ceremony’s ambiance, aligning with the time of year or wedding theme for a unique look.

Measuring and Sizing Your Wedding Arch
Measure your venue space to determine the ideal arch size. Ensure it fits the ceremony area while being proportional to the setup for stability and aesthetics.
5.1 Determining the Right Height and Width
Measure your ceremony space to ensure the arch fits seamlessly. A standard height of 8-10 feet is ideal, with width matching the aisle or decor. Adjust proportions to balance the area, ensuring stability and visual harmony. Use free PDF plans as a guide to calculate precise dimensions for your wedding arch design.
5.2 Adjusting Plans for Indoor or Outdoor Use
Modify your arch plans based on the venue. Outdoor settings may require sturdier frames and weather-resistant materials, while indoor designs can focus on aesthetics. Free PDF plans often include tips for adapting structures to different environments, ensuring stability and style whether under open skies or within four walls.
Budget-Friendly Tips for Building a Wedding Arch
Save money by using reclaimed wood and affordable materials. Opt for DIY decorations and invest in durable elements for a cost-effective, long-lasting wedding arch.
6.1 Saving Money on Materials
Minimize costs by using reclaimed wood, PVC pipes, or fabric. Repurpose items like old doors or windows for a unique look. Opt for seasonal flowers or greenery instead of exotic blooms. Shop during sales or use coupons for craft supplies. Consider renting decorative elements to reduce expenses without compromising style. These strategies help create a stunning arch affordably.
6.2 DIY Decorations to Enhance the Arch
Add personal touches with handmade decorations. Use fairylights, ribbons, or lace for a romantic glow. Incorporate fresh flowers, greenery, or silk alternatives for a vibrant look. Create paper flower garlands or fabric drapes to customize the design. These DIY elements not only save money but also reflect your unique style, making the arch a memorable focal point of your ceremony.
Tools and Software for Customizing Wedding Arch Plans
Use SketchUp for 3D modeling and free PDF editors to modify plans. These tools help tailor designs to your preferences, ensuring a perfect fit for your wedding theme.
7.1 Using SketchUp for 3D Modeling
SketchUp simplifies 3D modeling for wedding arches, allowing users to create detailed designs and visualize their arch before construction. Its intuitive interface enables easy experimentation with different styles and materials, ensuring a perfect blend of aesthetics and structural integrity. It’s ideal for precise measurements and alignment, making your arch both beautiful and sturdy. Share designs with contractors for collaboration.
7.2 Free PDF Editors for Modifying Plans
Free PDF editors allow you to modify and customize wedding arch plans to suit your vision. Tools like Smallpdf or PDFescape enable editing, annotating, and converting PDFs without watermarks. Resize dimensions, add notes, or adjust designs seamlessly. These editors are cost-effective and user-friendly, ensuring your wedding arch plans are tailored to perfection. Compatible with SketchUp designs for a polished finish.
Time-Saving Tips for Assembling a Wedding Arch
Pre-cut materials, use templates, and simplify steps to save time. Assemble frames first, then attach decor for efficiency. Ensure all parts are ready before starting the project.
8.1 Pre-Cutting Materials Before Assembly
Pre-cutting materials ensures a smooth assembly process. Measure and cut wood, fabric, and decorative elements in advance. This step prevents delays and allows you to focus on constructing the arch efficiently. Use a detailed plan to mark precise lengths, ensuring accuracy and minimizing waste. Proper preparation saves time and reduces stress during assembly.
8.2 Simplifying the Assembly Process
Simplify assembly by organizing materials and tools beforehand. Follow the plan step-by-step, starting with the base and moving upward. Use pre-cut pieces to save time and reduce complexity. Consider enlisting a helper to stabilize the structure while assembling. Ensure all connections are secure to maintain stability and achieve a professional finish without unnecessary complications.
Common Mistakes to Avoid When Building a Wedding Arch
Avoid structural instability by ensuring proper base securing and accurate measurements. Prevent design flaws by testing the arch before the ceremony and addressing weaknesses promptly.
9.1 Structural Stability Issues
Ensure your wedding arch is sturdy by using reinforced supports and proper weight distribution. Avoid weak joints and uneven bases, which can cause the arch to topple. Free PDF plans often highlight these common mistakes, providing solutions like crossbeams or anchoring systems to guarantee stability, especially outdoors or in windy conditions.
9.2 Design Flaws and How to Fix Them
Common design flaws include uneven proportions, poor material choices, and over-decorating. To fix these, use free PDF plans for balanced templates, ensure symmetry, and select durable, weather-resistant materials. Avoid clutter by focusing on a cohesive theme. Test the design beforehand to identify and correct any aesthetic or structural issues for a polished, professional look.
Inspiring Examples of Wedding Arch Designs
Explore stunning wedding arch designs, from floral masterpieces to rustic charm. Free PDF plans offer creative ideas, helping you craft a breathtaking focal point for your ceremony.
10.1 Real-Life Wedding Arch Ideas
Discover breathtaking real-life wedding arch ideas, from elegant floral arrangements to rustic wooden designs. Explore how couples incorporated personal touches, seasonal elements, and creative decorations. Free PDF plans offer inspiration for crafting unique arches that reflect individual styles, ensuring a memorable ceremony backdrop. Whether classic or modern, these ideas spark creativity for your perfect wedding arch.
10.2 Unique and Creative Arch Designs
Explore innovative arch designs, from geometric shapes to living greenery walls. Discover how to incorporate lighting, flowers, or unconventional materials like metal or fabric. These creative ideas, inspired by real weddings, offer inspiration for crafting a one-of-a-kind arch that reflects your personality. Free PDF plans provide templates to bring these imaginative designs to life effortlessly.
Seasonal Variations for Wedding Arches
Adapt your arch to match the season—spring blooms, summer greenery, fall warm tones, or winter sparkles. Free PDF plans offer versatile templates for seasonal wedding arch designs.
11.1 Summer and Spring Wedding Arch Ideas
Summer and spring weddings shine with vibrant arch designs. Use fresh flowers, greenery, or pastel drapes for a light, airy feel. Incorporate seasonal blooms like peonies or hydrangeas for a romantic touch. Free PDF plans offer customizable templates to match your theme, ensuring a stunning centerpiece for your ceremony. Add lace, ribbons, or fairy lights for extra charm and elegance.
11.2 Winter and Fall Wedding Arch Designs
Winter and fall wedding arches exude warmth and coziness. Incorporate seasonal elements like pinecones, evergreen branches, and rich ribbons in deep red or burgundy tones. Free PDF plans offer designs featuring natural materials like wood or twigs. Add fairy lights or candles for a magical glow, creating a charming centerpiece for indoor or outdoor ceremonies during the cooler months.
Safety Tips for Installing and Using a Wedding Arch
Ensure your wedding arch is stable and secure. Check all connections, use sturdy materials, and anchor it firmly to prevent tipping; Prioritize guest safety always.
12;1 Securing the Arch for Outdoor Events
For outdoor weddings, ensure the arch is firmly anchored to withstand wind. Use weights, sandbags, or ground anchors to stabilize the base. Check materials for durability and weather resistance; Tighten all connections securely and consider adding reinforced brackets for extra stability. Regularly inspect the structure before and during the event to ensure safety and prevent any damage.
12.2 Ensuring Stability in Windy Conditions
To maintain stability in windy conditions, choose a wide and sturdy base for your wedding arch. Use heavy weights or sandbags to anchor the structure. Ensure all joints are tightly secured and consider adding reinforced brackets. Opt for weather-resistant materials and avoid tall, narrow designs that may sway. For extra safety, consult a professional for extreme wind conditions.
Final Check and Decoration
Conduct a final inspection to ensure the arch is secure and all decorative elements are in place. Add last-minute touches like flowers, greenery, or fabric draping to enhance its appearance.
13.1 Final Inspection Before the Ceremony
Before the ceremony begins, inspect the wedding arch for stability, ensuring all connections are secure. Check for any loose parts or damage. Verify that all decorative elements are evenly spaced and properly attached. Make any necessary adjustments to ensure the arch is perfectly aligned and visually stunning. This final check ensures everything is flawless for your special day.
13.2 Adding Last-Minute Decorative Touches
Add fresh flowers, greenery, or ribbons to enhance the arch’s visual appeal. Incorporate fairy lights or fabric drapes for a romantic glow. Ensure all decorations are securely attached to avoid any issues during the ceremony. Personalize the design with themed elements like seashells or seasonal items. These final touches will make the arch a breathtaking focal point of your wedding celebration.